
How to create and share a new calendar in Outlook 2016
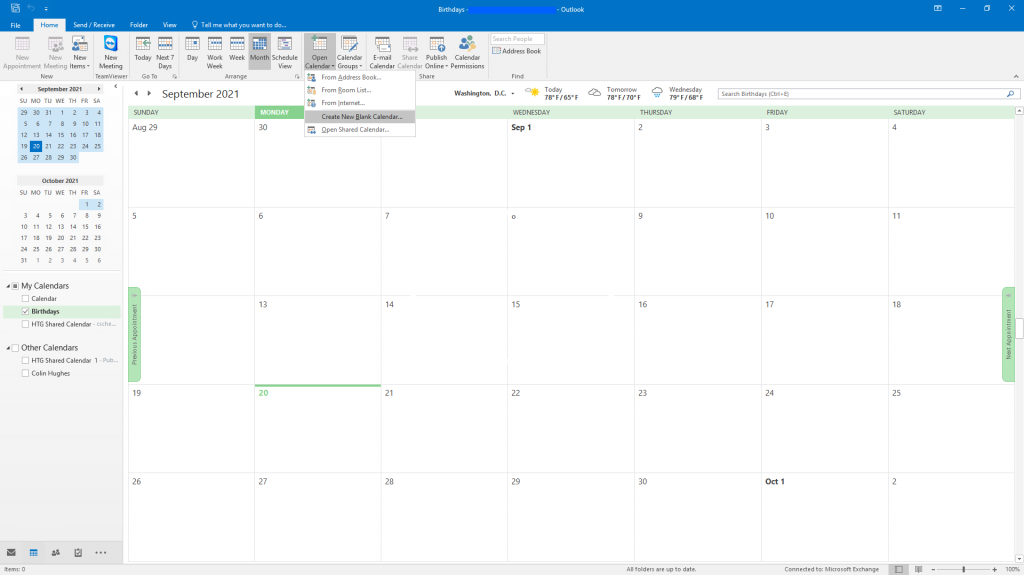
1. Select the Calendar tab at the bottom left, and on the “Home” tab at the top, select “Open Calendar > Create New Blank Calendar”
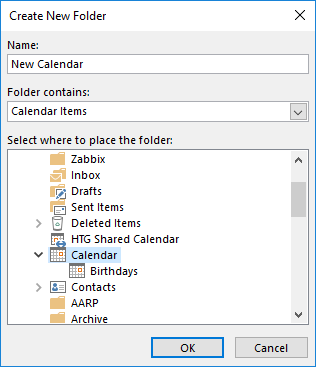
2. Give the calendar a name and select the “Calendar” dropdown to save the calendar there and click “OK”.
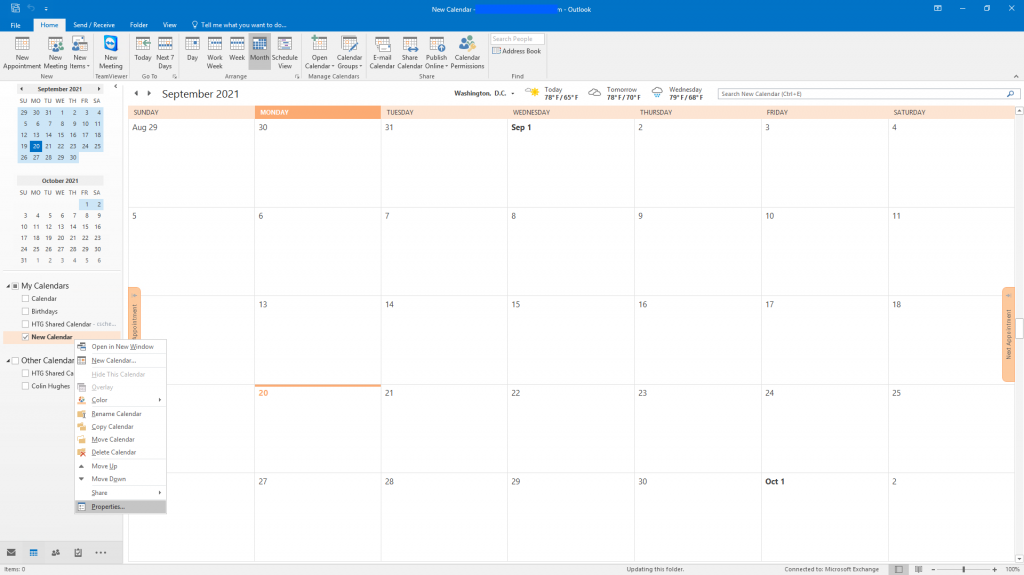
3. The newly created calendar will show up on the left hand side of the screen. To allow users to edit the calendar, right click it and select “Properties”.
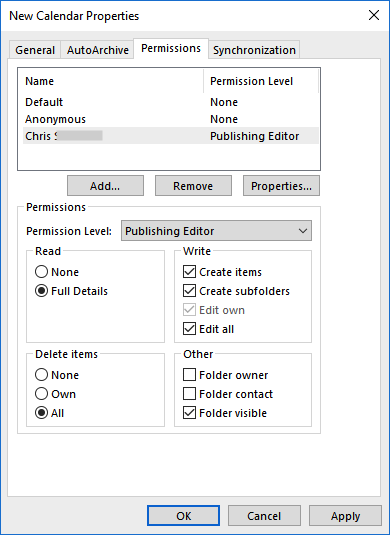
4. In the “Permissions” tab, click on “Add”, then select users you wish to share the calendar with and click “OK”. Select each user in the list one at a time and check their permissions level. The standard permissions given to users to be able to edit the calendar is “Publishing Editor”, but custom permissions can be chosen for each user. Once done, click on “Apply” then “OK”.
5. The last step is to share the Calendar invite link to the users you gave permissions to. To send them the email with the invite link, click the “Share Calendar” button in the “Home” tab at the top. A new email compose window will pop up, fill out the “To” field with the users you share the Calendar with and send out the email. The recipients will be able to click the share link in the email which will then open up the Calendar in their Outlook.

Helpful Links
- Connect an Apple device to receive email
- Connect an Android device to receive email
- How to get Exchange Server name
- How to set up Outlook app on Android
- How to set up Outlook app on Apple
- Setting Up and Accessing Your Proofpoint Essentials Account
- How to Release or Block Quarantine Emails
- Trouble Sending and Receiving Email
- How to Make and Share an Outlook Calendar